Programming the Arduino micro
Arduino boards do not require specialized hardware in order to programmed. They connect to you computer through USB and have all the required hardware for programming on board.
All Arduino boards can be programmed with the Arduino IDE. It is open source, free of charge and available for the Linux, Max OS and Windows operating systems.
Installing the Arduino IDE
The download page for all versions is located at https://www.arduino.cc/en/software. The software is also available in the Windows app store and is included in many Linux distributions.
The Arduino project has a lot of documentation for beginners including installation instructions for Windows.
Installing the required libraries
Once the Arduino IDE has been installed on your system you need to install a couple of required libraries. This can be done with the library manager included in the Arduino IDE.
You can access the library manager through the menu under Tools->Manage Libraries… or by pressing Ctrl-Shift-I. Opening the library manager can take a moment on slow systems.
Installing the Adafruit SSD1306 library
The first required library is the Adafruit SSD1306 library. You can enter “ssd1306” into the search field to locate it.
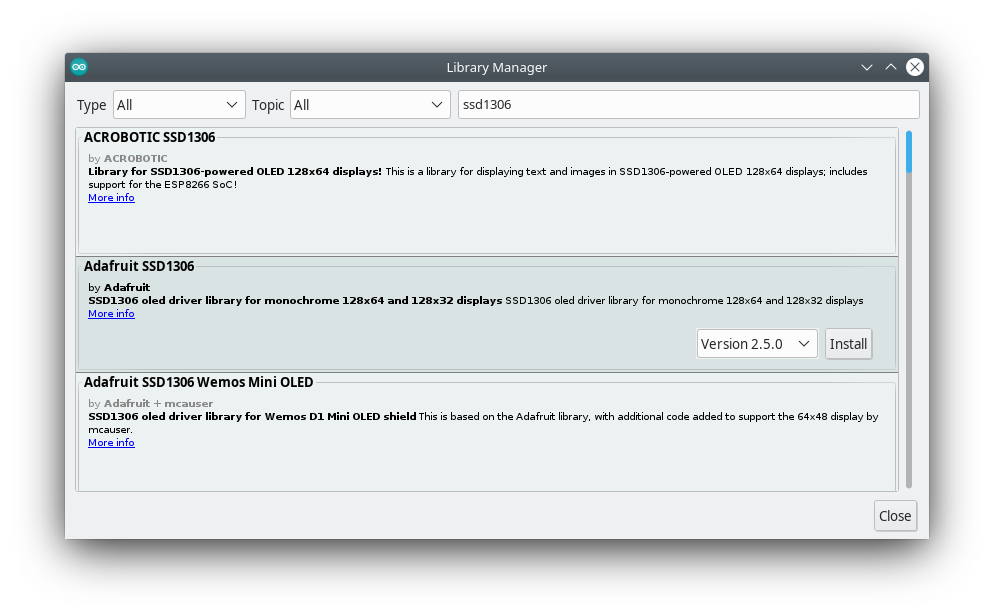
Click on the Adafruit SSD1306 result to select it and then choose the latest version and click Install.
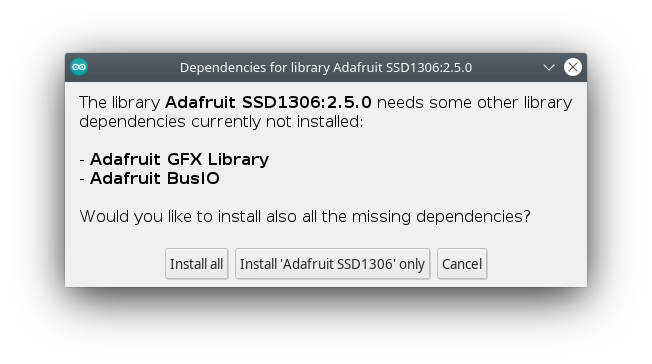
The Adafruit SSD1306 library depends on a couple of other libraries. The library manager will ask you if you want to install the dependencies as well. Click Install all and wait until the installion is complete.
Installing the Loconet library
The second required library is the Loconet library. Type “loconet” into the search field to locate it.
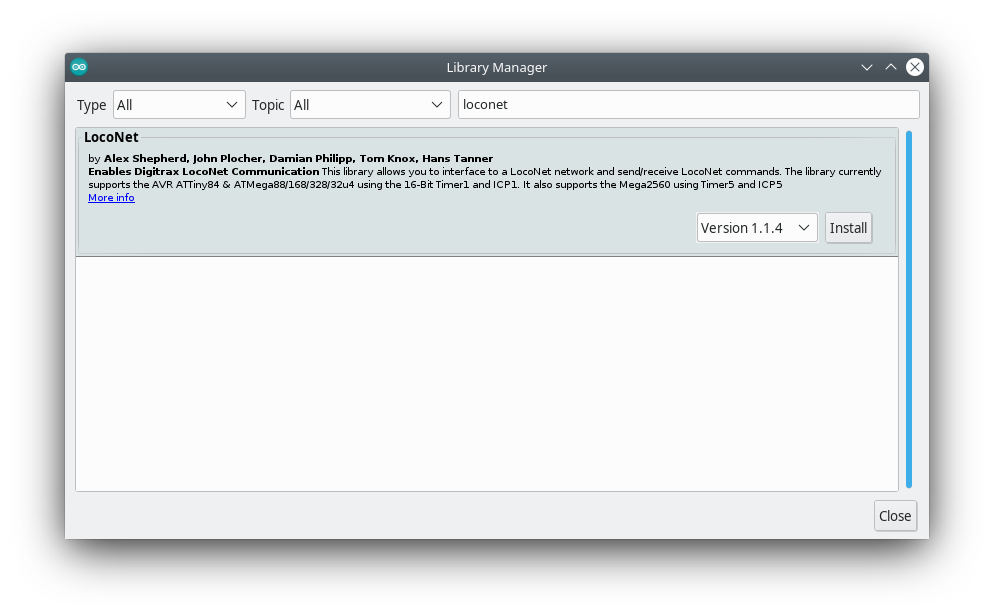
Click on the result to select it, choose the latest version and click Install. Wait for the installation to complete and close the library manager.
Setting up the IDE
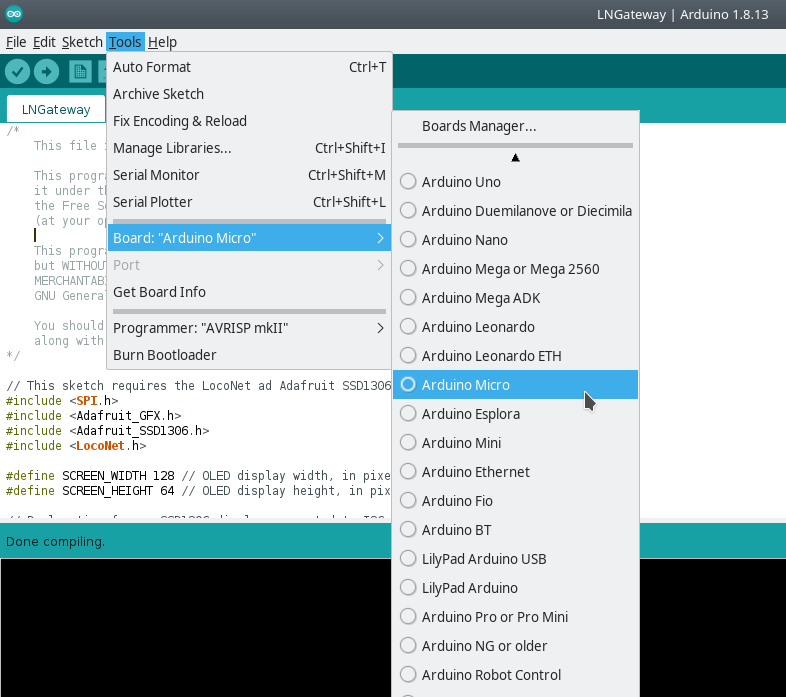
Arduino produces many different board types. We need to tell it for which specific board it needs to compile the source code and the port where it should talk to the board.
Selecting the board type
The board type can be selected through the menu under Tools->Board:->Arduino Micro.
Selecting the serial port
The serial port can be selected trough the menu Tools->Port:
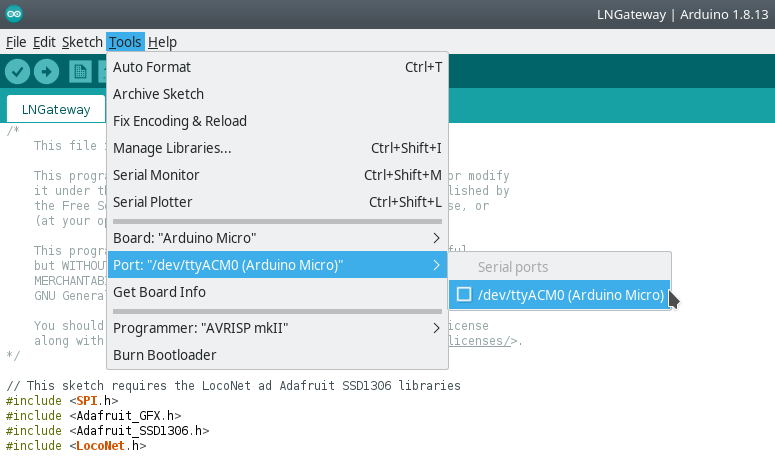
The name of the port depends on your operating system. On Windows serial ports are usually named like “COM1”. Most of the time the menu entry will also say “Arduino Micro” next to the port name. You need to have the Arduino board connected to your computer in order to select the serial port.
Uploading the project
Arduino software projects are called sketches. Load the LNGateway sketch into the IDE and click the Upload button in the tool bar under the menu bar:

This will compile the code and load the result on the arduino board.
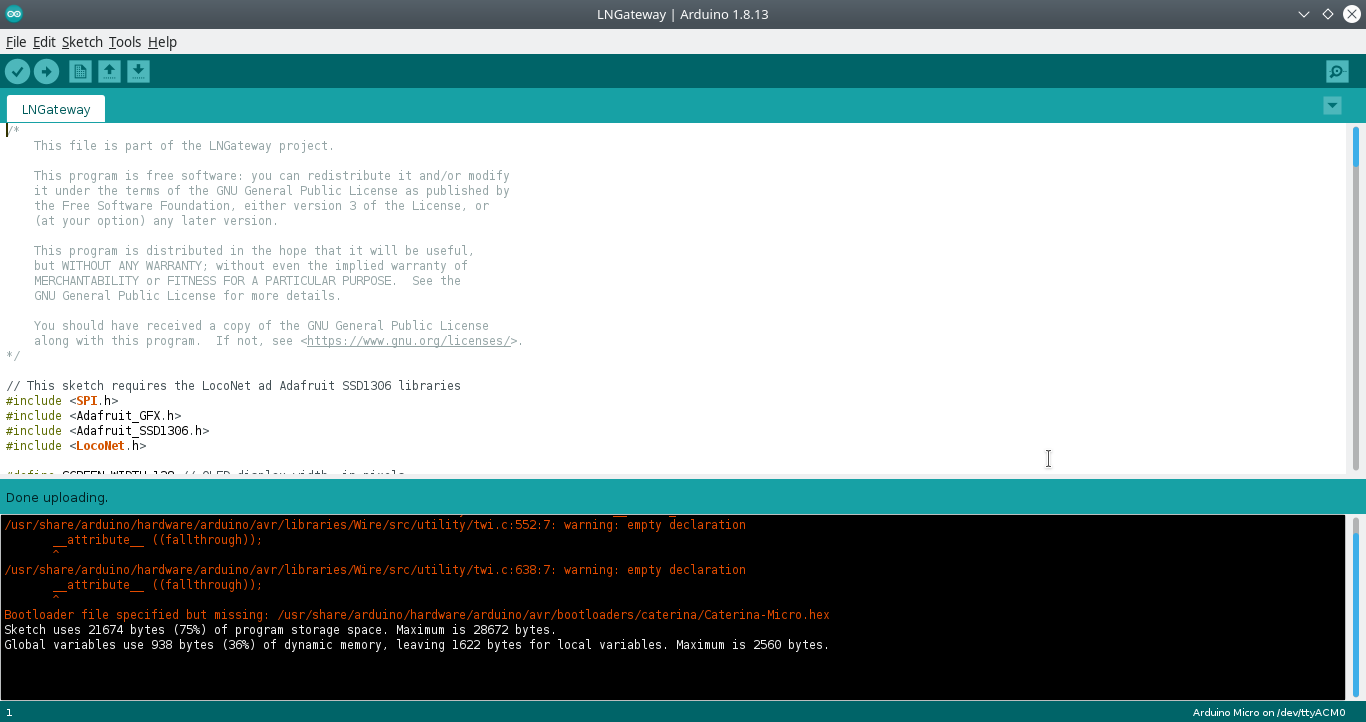
You may see some warnings during the compilation process. When the IDE says Done uploading. your Arduino has been programmed successfully.
You can program the Arduino while it is installed on the LNGateway PCB. If you have already programmed the Arduino with the LNGateway project, the Arduino IDE might have issues talking to the board while programming, because both use the built-in serial port. Short out the PMODE pin in the corner of the PCB next to the Arduino board to tell the project to release the serial port.